a) After downloading
the file, locate the file on your hard drive and double click on it to begin
installation.
b) Select Next
to the first box.
c) Click Next
to proceed with the installation.
d) Enter
your email address and any appropriate information that are requested and
proceed with the installation.
e) Double Click
on the new, WSFTP icon on your desktop.
Please note
that there are a number of older and current versions of WSFTP floating around.
As a result, some of the instructions provided here cannot possibly reflect
all the versions, which have been released in the past 5 years. The only small
difference you may encounter is where some of the options can be found (depending
on the client version you're using). In any event, everything is pretty well
much the same.
1. Open
your WSFTP client
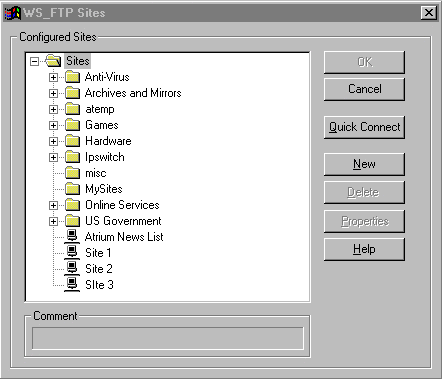
2. The dialog box "WS_FTP" Sites should display. If not, click the "Connect"
button.
3. Select "New"
You should
see this dialog box:

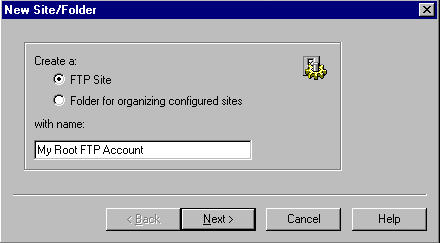
You'll be
guided through these options:
1. New Site/Folder:
Choose a name for this account

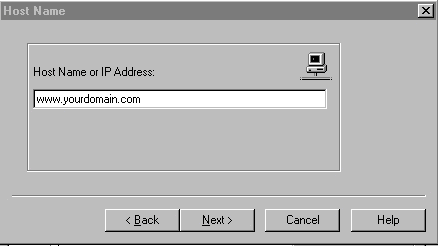
2. Host Name
or IP address: www.yourdomain.com

3. User
ID: Main system login
4. User Password: Main System Password
5. Select "Save Password"

6. Select "Finish"
Done! Your
can now FTP into your site
Back to Support
menu


