E-mail Aliases
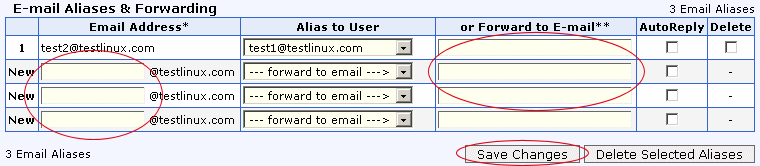
• To add an email alias , fill
in the new email alias name and select the local user you wish to forward emails to from the
select list in the Alias to User column.
• If you wish to forward emails received at this address to another email address,
simply fill in the email addresses in the Forward to E-mail column. Multiple
email addresses must be separated by a space.
• To change an email alias address, you will need to delete the
email alias and re-add it again.
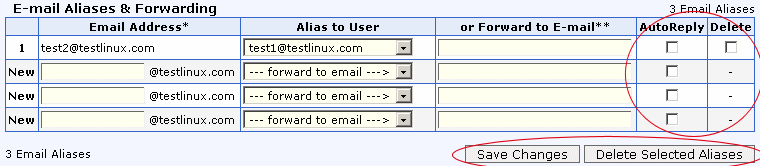
• To delete an email alias , check the checkbox beside the email
address to be deleted and click Delete Selected Aliases.
• To add an auto reply , check the auto reply checkbox
corresponding to the email in which you want to submit an automatic reply upon receiving any
mail. Proceed to the Email AutoReply link to choose your reply message or
define your own message.
Unlimited Email Aliases:
It is possible to setup the mail for your domain so that any email sent to *@yourdomain.com
will be forwarded to one specific POP3 account or an outside email account. To add
unlimited email aliases to your domain, simply create an Email user or alias with the name
"default" (without the quotes).
Note: You may not use both functions "Alias to
User" and "Forward to E-mail" at the same time for a particular email address.
Back
to Support menu
|